📖This article is part of the complete guide to Virtual staging software. Why a Practical Guide to Virtual Staging Software Is Essential in 2026
If you’re a real estate agent, you know that first impressions are everything. In the first few seconds when a potential buyer scrolls through their phone or computer screen, the decision to click on your listing or not has already been made. Industry data shows that listings with high-quality photos receive up to 118% more views on the MLS. But what happens when the property is empty, has dated furniture, or—worse yet—amateur photos taken with a smartphone?
That’s where virtual staging software comes in. This practical guide was created to show you exactly how you can turn ordinary photos into true marketing assets, without having to spend a fortune on designers or physical staging. Unlike traditional services that charge R$150 per room and take days to deliver, modern AI-powered solutions deliver results in seconds.
To get the full picture, I recommend reading our
complete guide on virtual staging before moving on.
What Is a Virtual Staging Software and How Does It Work?
📚Definition
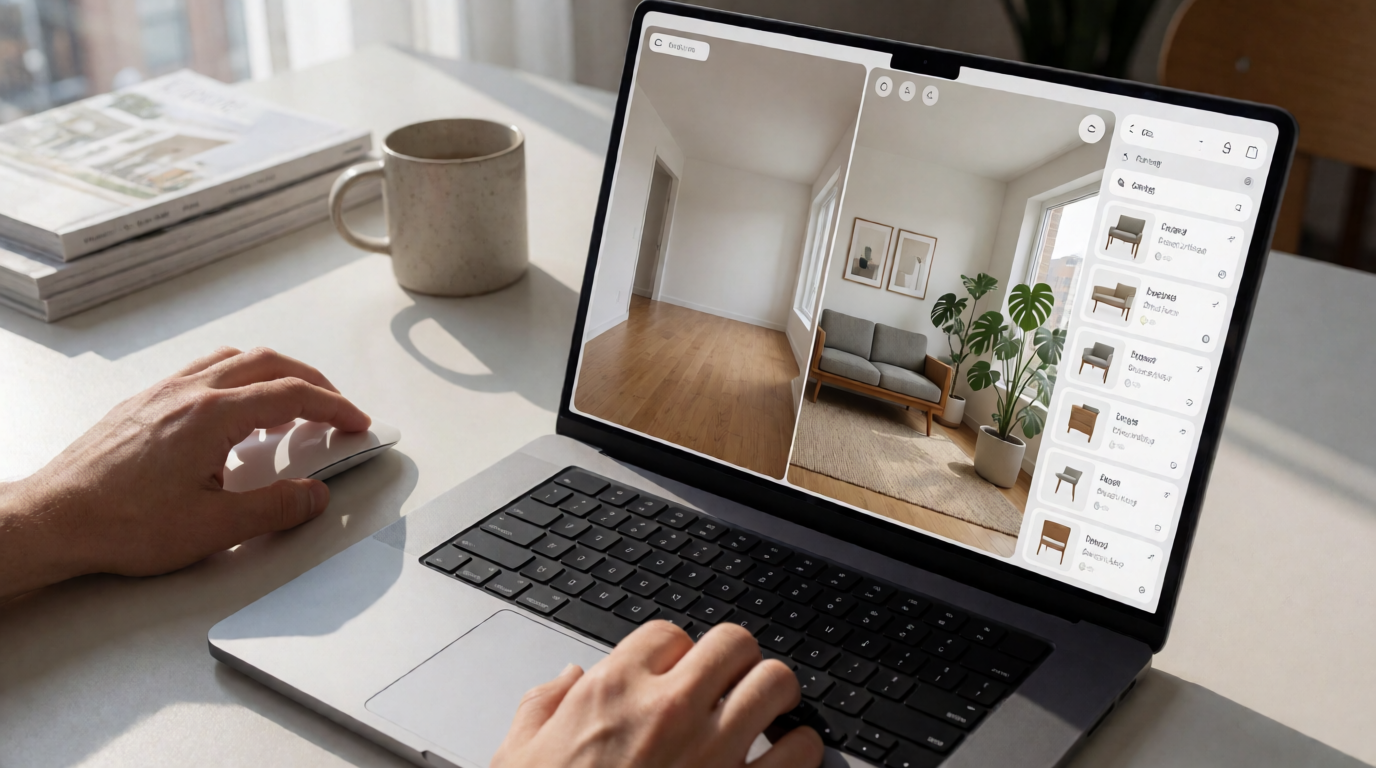
Virtual staging software is a technological tool that uses artificial intelligence and computer vision to add furniture, decor, and realistic visual elements to photos of empty or poorly furnished properties, without the need for physical furniture or expensive photo shoots.
Unlike what many people think, this process isn’t simply “placing a sofa in the photo.” Modern software analyzes the room’s depth, lighting, perspectives, and even the architectural style of the property to position furniture proportionally and naturally. It’s like having an interior designer and a professional photographer working together on every image.
The computer vision algorithm identifies walls, floors, windows, and light sources, mapping the space three-dimensionally. From there, a library of styles—ranging from Scandinavian minimalist to rustic contemporary—is applied intelligently. The result? Photos that look like they were taken in a professionally staged home.
Three key benefits define this technology:
- Speed: Where a stager would take days, the software delivers in minutes.
- Cost: While renting furniture for physical staging costs between R$5,000 and R$15,000 per month, virtual staging costs pennies per image.
- Flexibility: You can test different styles for the same room in seconds—something unthinkable with traditional staging.
Why This Practical Guide Matters for Agents and Photographers
If you still think virtual staging is “just another passing trend” in real estate, the numbers prove otherwise. A study by the National Association of Realtors (NAR) revealed that 82% of agents say staging helps buyers visualize the property. But it goes further: properties with virtual staging sell up to 73% faster than empty ones.
The Real Impact on Sales
- Conversion Rate: Listings with virtually staged photos are 40% more likely to generate in-person showings.
- Perceived Value: Empty or outdated-furnished properties are perceived as 10% to 15% cheaper than they actually are. Virtual staging eliminates that distortion.
- Online Engagement: The average viewing time for listings with staged photos is 50% higher. That means the buyer reads the description, sees all the details, and emotionally connects with the property.
💡Key Takeaway
Virtual staging software is not just an aesthetic tool—it’s a proven strategy for pricing and speed of sale. Every real invested in virtual staging returns on average R$10 to R$15 in added sale value.
For those working in competitive markets like
Property Photo Editing in Seattle or
Property Photo Editing in Minneapolis, using AI Property Enhancement has become a must-have differentiator, not an option.
Step by Step: How to Use a Virtual Staging Software in Practice
The beauty of modern tools lies in the simplicity of the workflow. Instead of hiring a designer, scheduling a photo shoot with furniture, and waiting days for delivery, you can do the entire process in less than 10 minutes per room.
1. Capturing the Images
The first step is to photograph the property. Use a good-quality cell phone camera (iPhone 15 or Samsung Galaxy S24 models are sufficient) or, preferably, a DSLR camera. Golden rule: Photos with good natural lighting and wide angles produce the best staging results. Avoid photos with too much zoom or distorted angles.
2. Selecting the Decor Style
Here lies the true power of the software. You need to align the style with the target buyer’s profile for the property:
| Buyer Profile | Recommended Style | Strategy |
|---|
| Young Professionals | Modern Minimalist | Clean furniture, neutral colors, tech emphasis |
| Families | Cozy Contemporary | Large sofas, rugs, family-friendly decor |
| Investors | Versatile Neutral | Furniture without strong personality, focus on space |
| Luxury | Sophisticated Classic | Period furniture, chandeliers, decorative panels |
3. Application and Adjustments
Upload the photo into the software and select the desired style. The best part is you can:
- Adjust the intensity of artificial lighting
- Change wall colors and textures
- Add or remove specific objects (plants, frames, pillows)
- Manually position furniture if needed
4. Review and Finalization
Before exporting, check a few critical points:
- Proportion: Are the furniture items at the correct scale relative to the room?
- Lighting: Do the shadows of the virtual furniture match the direction of the real light?
- Realism: Do the upholstery textures look real or artificial?
- Compliance: Does the image meet MLS specifications (resolution, file size)?
To avoid common mistakes, check out our guide on
Common Mistakes in Real Estate Image Processing.
Traditional Virtual Staging Software vs. AI-Powered Solutions
Comparing these approaches reveals deep differences that go far beyond price. Understanding these nuances is essential for making the right decision.
| Aspect | Traditional Software (Manual) | Generic AI Software | RealVision AI (Modern Approach) |
|---|
| Delivery Time | 2 to 5 days per room | 1 to 5 minutes | 12 seconds |
| Cost per Room | R$80 to R$200 | R$5 to R$15 | Pennies (plan inclusive) |
| Visual Quality | High (depends on designer) | Variable (average) | Superior (models trained specifically for architecture) |
| Customization | Full | Limited to templates | Style library + fine adjustments |
| Architectural Consistency | Guaranteed | Risk of distortions | Precise preservation of lines and proportions |
| Revisions | Unlimited (costs time) | Limited | Unlimited and instant |
| Learning Curve | High (Photoshop + design) | Low (simple interface) | Very low (drag and drop) |
What sets modern solutions apart, like those we offer at
Real Vision AI, is the training of AI models specifically on real estate data. While generic tools like Midjourney or DALL-E can hallucinate—creating windows where there are none, crooked doors, or floating furniture—specialized real estate systems have been trained on millions of real interior photos, respecting physics and architectural proportions.
The Technology Behind Modern Virtual Staging
To truly master the use of these tools, it helps to understand what happens “under the hood.” Modern virtual staging combines three main technologies:
Computer Vision and Semantic Segmentation
The software first “understands” the scene. It identifies every element in the photo—wall, floor, ceiling, window, door—and separates them into layers. This allows furniture to be positioned correctly behind real objects (like a sofa behind a coffee table) and for lighting to be applied consistently.
Generative Adversarial Networks (GANs)
GANs are responsible for generating realistic furniture and textures. Two AI models compete against each other—one generates the image, and the other tries to detect whether it’s real or generated. This iterative process produces increasingly realistic results.
Diffusion Models
The newest technology uses diffusion models to “paint” virtual elements directly onto the original image, maintaining consistency in lighting, shadows, and reflections. That’s why the result looks so natural.
Best Practices for Professional Results
Based on hundreds of projects I’ve followed with agents and photographers, here are the practices that really work:
1. Less Is More
Don’t overcrowd the room. A living room with a sofa, an armchair, a coffee table, and a rug is enough. Too much furniture creates visual clutter and distracts the buyer.
2. Neutral Colors Work Best
Colors like beige, light gray, navy blue, and dark green are safe and appeal to most buyers. Very vibrant colors (orange, purple, hot pink) can turn off buyers with different tastes.
3. Think About Room Proportion
A three-seat sofa in a small room (3m x 3m) will look disproportionate. Use furniture at the correct scale. Most software allows you to adjust object sizes—use that feature.
4. Create Visual Flow
Position furniture to guide the buyer’s eye through the image. A rug leading to the window, an armchair facing the center of the room, a dining table aligned with the chandelier—these details make a difference.
5. Add Human-Scale Elements
A plant, a vase, an open book on the table—these small objects bring the room to life and help the buyer envision their own lifestyle there.
💡Key Takeaway
The best virtual staging is the one the buyer doesn’t even notice was done. If the photo looks natural and inviting, the staging has done its job.
For those just starting out, I recommend experimenting with different styles in the same room. The
Key Benefits of Virtual Furniture Staging show that the ability to test visual options is one of the biggest advantages of the technology.
Real Use Case: From Empty Property to Sold in 14 Days
Recently, I worked with an agent in Houston who was struggling to sell an 80m² apartment in a new condominium. The property had been empty for 60 days and was getting few showings. We implemented virtual staging with the “Cozy Contemporary” style—light gray sofa, wooden dining table, beige rug.
The results were impressive:
- First week: 8 scheduled showings (compared to an average of 1–2 before)
- Second week: 3 offers received
- Day 14: Sale closed at 5% above listing price
The agent saved R$8,000 in furniture rental for physical staging and accelerated the sale by 45 days compared to the local market average.
Common Challenges and How to Overcome Them
Even with advanced technology, some issues can arise. Here are the most common ones and how to solve them:
Problem 1: Inconsistent Lighting
If the original photo has mixed lighting (yellow light on one side, white light on the other), the virtual furniture may look “stuck on.” Solution: Use photos with as uniform natural lighting as possible. If needed, adjust white balance before uploading to the software.
Problem 2: Distorted Proportions
Wide-angle lenses can distort the perception of space. Furniture may look too big or too small. Solution: Shoot with a 24mm or 35mm lens (full frame) to maintain natural proportions. Avoid lenses below 16mm.
Problem 3: Unrealistic Textures
Some generic AIs produce fabric textures that look too smooth or patterns that repeat. Solution: Prefer software that offers high-resolution textures and the option to adjust the fabric’s visual “wear.”
Frequently Asked Questions (FAQ)
Yes, the vast majority of MLS accept virtually staged images, provided there is a clear disclosure in the listing. Check your local MLS’s specific rules, but the practice is widely accepted across the U.S. and Canada.
Can I use photos taken with my cell phone?
Yes, as long as the resolution is high enough (minimum 12 megapixels) and the lighting is good. Modern phones like the iPhone 16 Pro or Samsung Galaxy S25 offer sufficient quality for most applications.
How long does it take to learn how to use the software?
Most modern software has a learning curve of less than 30 minutes. You can create your first staged image in under 5 minutes after understanding the basic workflow.
Does the software work for commercial properties?
Absolutely. Offices, retail spaces, warehouses, and commercial spaces also benefit from virtual staging, with styles appropriate for each type of business.
Is there a risk of the image looking “fake”?
With quality software and good input photos, the result is indistinguishable from a real photo of a staged property. The secret lies in the quality of the original photo and the software used.
Can I customize individual furniture pieces?
Yes, most software allows you to position, resize, and rotate individual furniture items, as well as change colors and textures for each piece.
Does virtual staging work for all rooms?
Yes, from living rooms and bedrooms to kitchens, bathrooms, and outdoor areas. Each room has specific furniture libraries tailored to its needs.
Do I need a powerful computer to run the software?
Not necessarily. Most modern solutions operate in the cloud, allowing you to work from any device with internet access.
Conclusion
Virtual staging software has gone from luxury to essential tool in the arsenal of any agent, real estate photographer, or developer who wants to stand out in 2026. The combination of speed, affordable cost, and professional quality makes this technology an investment with nearly immediate return.
Throughout this practical guide, you’ve seen that you don’t need to master Photoshop or hire expensive designers. With the right workflow and a tool like
Real Vision AI, any professional can turn ordinary photos into high-impact marketing assets.
To take the next step, explore the resources we’ve created on
Property Photo Editing and see how technology can accelerate your sales. The market isn’t waiting—and your competitors are already using these tools.
About the Author
RealVisionAI Editorial Team is the team specialized in real estate visualization and PropTech at
Real Vision AI. With over 5 years of experience applying artificial intelligence to the real estate market, we’ve helped hundreds of agents and photographers transform their listings and accelerate sales through professional images generated in seconds.
Recommended Readings
To deepen your understanding of these topics, we recommend reading the following articles:
Free Real Estate AI Visual Playbook 2026
Discover how top realtors boost listing engagement by 62% and close deals faster using AI photo enhancement and virtual staging.